|
|
||||||||
|
|
||||||||
|
|
||||||||
|
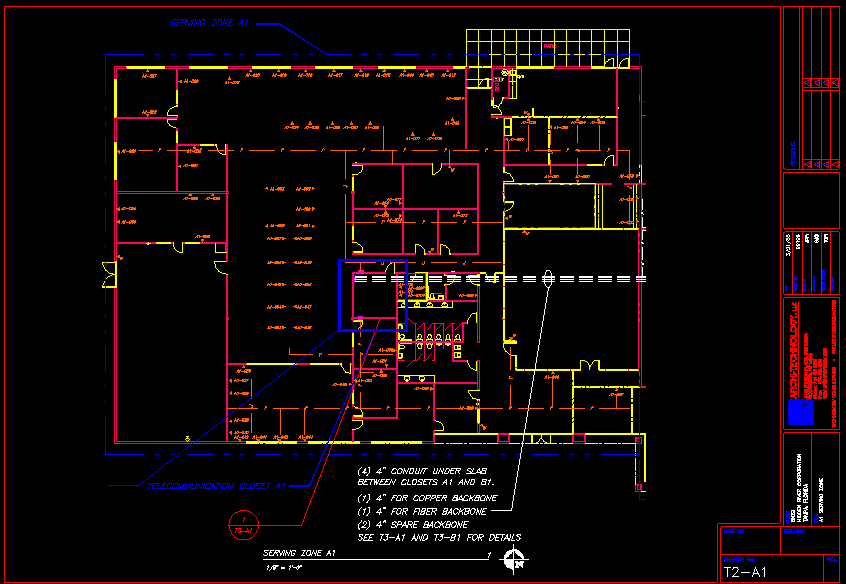
T2-A1 The building is divided up by it's serving zones. Drawing indicates drop locations, communication equipment rooms, access points and detail callouts for communication equipment rooms and other congested areas. |
||||||||
 |
||||||||
|
Click on the above picture to view the full drawing and then follow the links to see how the demonstration works. |
||||||||
| Back To Demo | ||||||||